Support Center

How to change .htaccess file permissions via BEZA Control Panel

Instructions via Slideshow

(Slideshow length 7 steps)

Instructions via Video

(Video 1:46 minutes)

View Slideshow

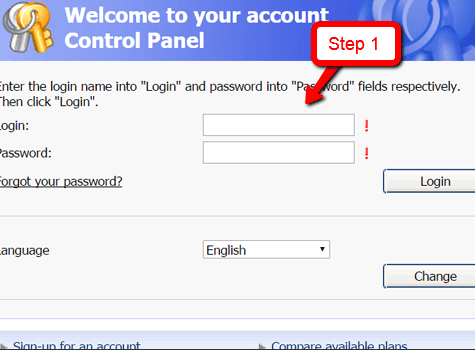
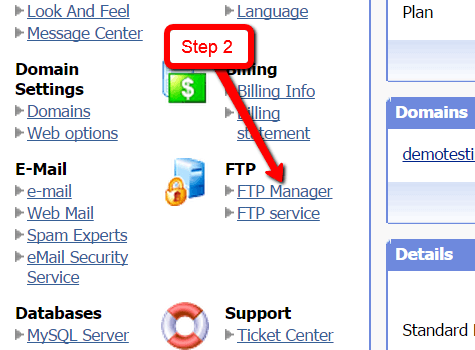
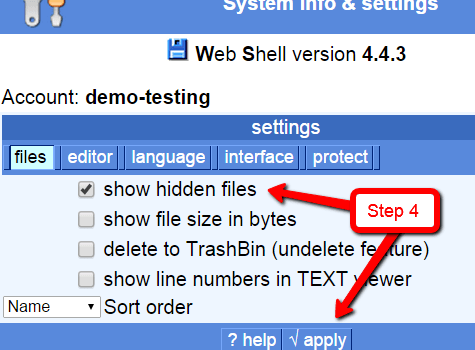
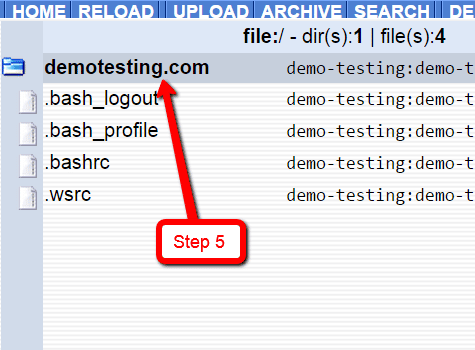
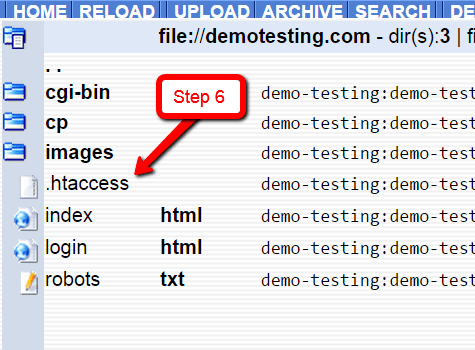
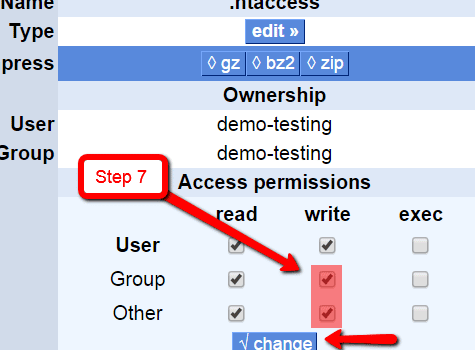
In the following 7 step slideshow, you’ll learn how to change the file permission on your website main .htaccess file.

BEZA.NET

How to change .htaccess file permissions via BEZA Control Panel

(File permissions of 666)

Step 1

Login to your BEZA Control Panel.

Step 2

Once you have successfully logged into your BEZA Control Panel, click on FTP Manager.

Step 3

On the File Manager section, click on the Webshell 4 Login button to launch the web browser FTP client.

Step 4

Once Webshell 4 opens up, on the right side panel under settings, place a check-mark on the box next to show hidden files and click the apply button.

Step 5

Next, on the right side panel, click on your website name. For example in this demo, I’ll click on the demotesting.com name which will open up this website files.

Step 6

Click on the .htaccess file in the left panel.

Step 7

On the right panel under Access permissions, select the two checkboxes under write column and click the change button below it.

Congratulations, the file permissions on .htaccess is complete

This concludes changing your website main .htaccess file permissions. If you need further assistance, please contact our technical support staff who are available 24/7 via phone, live chat or by email.

How to video to change file permissions of .htaccess via BEZA Control Panel

In the following how-to video, you’ll learn how to change the file permissions of your website main .htaccess file via your BEZA Control Panel.


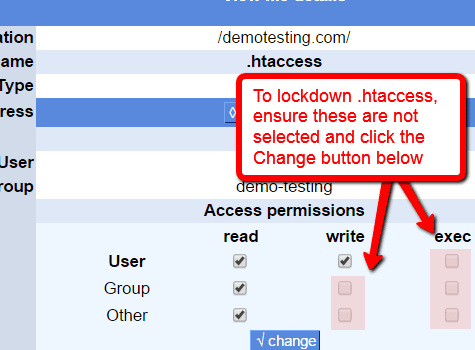
How to lockdown your website .htaccess

In the following 7 step slideshow, you’ll learn how to lockdown your website main .htaccess file.


BEZA.NET

How to lockdown .htaccess file permissions via BEZA Control Panel

(File permissions of 644)

Step 1

Login to your BEZA Control Panel.

Step 2

Once you have successfully logged into your BEZA Control Panel, click on FTP Manager.

Step 3

On the File Manager section, click on the Webshell 4 Login button to launch the web browser FTP client.

Step 4

Once Webshell 4 opens up, on the right side panel under settings, place a check-mark on the box next to show hidden files and click the apply button.

Step 5

Next, on the right side panel, click on your website name. For example in this demo, I’ll click on the demotesting.com name which will open up this website files.

Step 6

Click on the .htaccess file in the left panel.

Step 7

On the right panel under Access permissions, under the write column, only User checkbox should be selected. Click the change button below it to save changes.

Congratulations, the file permissions on .htaccess is complete

This concludes locking down your website main .htaccess file permissions. If you need further assistance, please contact our technical support staff who are available 24/7 via phone, live chat or by email.